Allow Clients to Upload Files to Any Website (Complete Guide)

Looking for a way to allow clients to upload files to your website? Whether you have your own website, or not, there are a ton of services, even free services, to share files with your clients.
In this guide, I'll show you two ways you can allow clients to upload files to any website.
The first method is completely free (using Google Forms), and the second is using the client portal service, Foyer.
If you only need clients to send you files securely, you could just go with Google Forms, but if you need more capabilities, like client login, e-signatures, secure messaging, and more, you should really be using a client portal like Foyer.
Both Google Forms and Foyer can be shared with your clients via embedding into your website, or even just through a link. So if you don't have a website set up, you can still have clients upload files to you!
At the end of the guide, I'll even show you how to link and embed both options into your website.
Let's get into our first option to allow clients to upload files to any website, which is completely free, by using Google Forms.
Allow Clients to Upload Files to Your Website with Google Forms
Google Forms is a great service that lets any one to securely accept files from clients.
The best part, is that it can be used for free, with no subscription so long as you use less than 15GB of data.
If you're wondering just how much space that is, check out our article on how big 15 gigabytes is.
Here's the breakdown of how much storage you'll get per user depending on your subscription (visit the Google Drive pricing page for more info):
- Personal (free): 15GB
- Business Starter ($6): 30GB
- Business Standard ($12): 2TB
- Business Plus ($18): 5TB
If you're not sure how much you need, just use the free version to start, you can always upgrade later!
Step 1: Create a Public Google Form with a File Upload Field
To get started, go to Google Forms and create a new form.
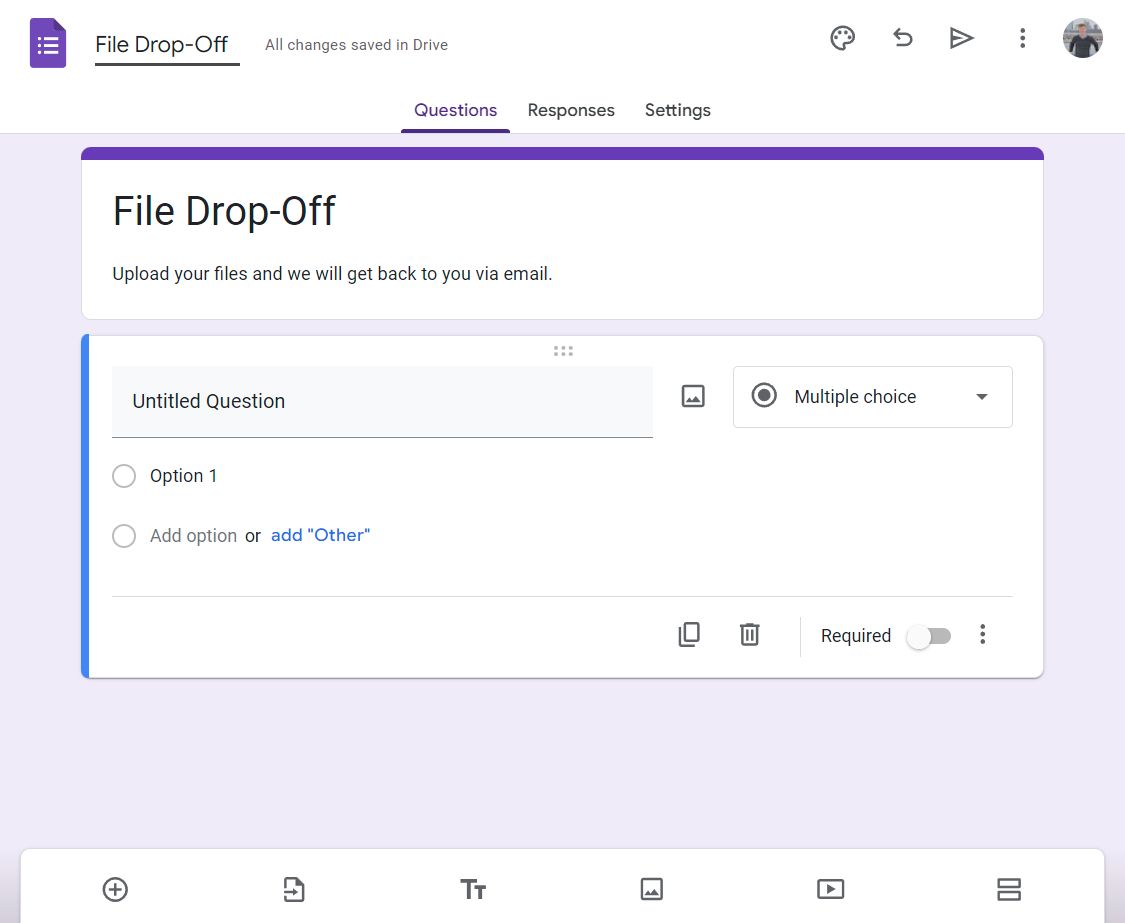
First, rename your form to something your clients will understand like "File Drop-Off". Adding a description will help guide your clients too.
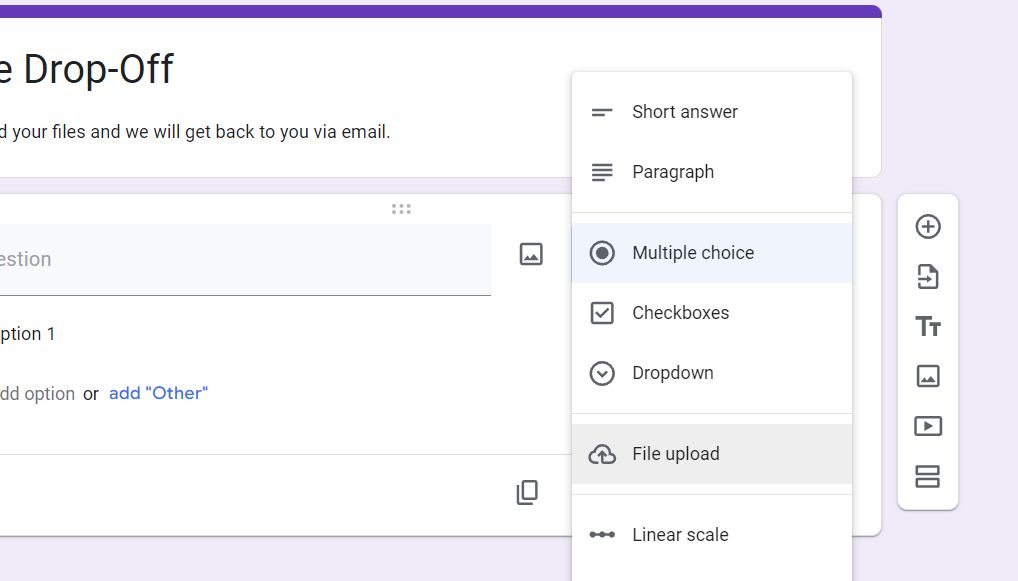
If you click on the "Multiple choice" dropdown, you can select which type of field you want in your form. Go ahead a select the "File Upload" field.
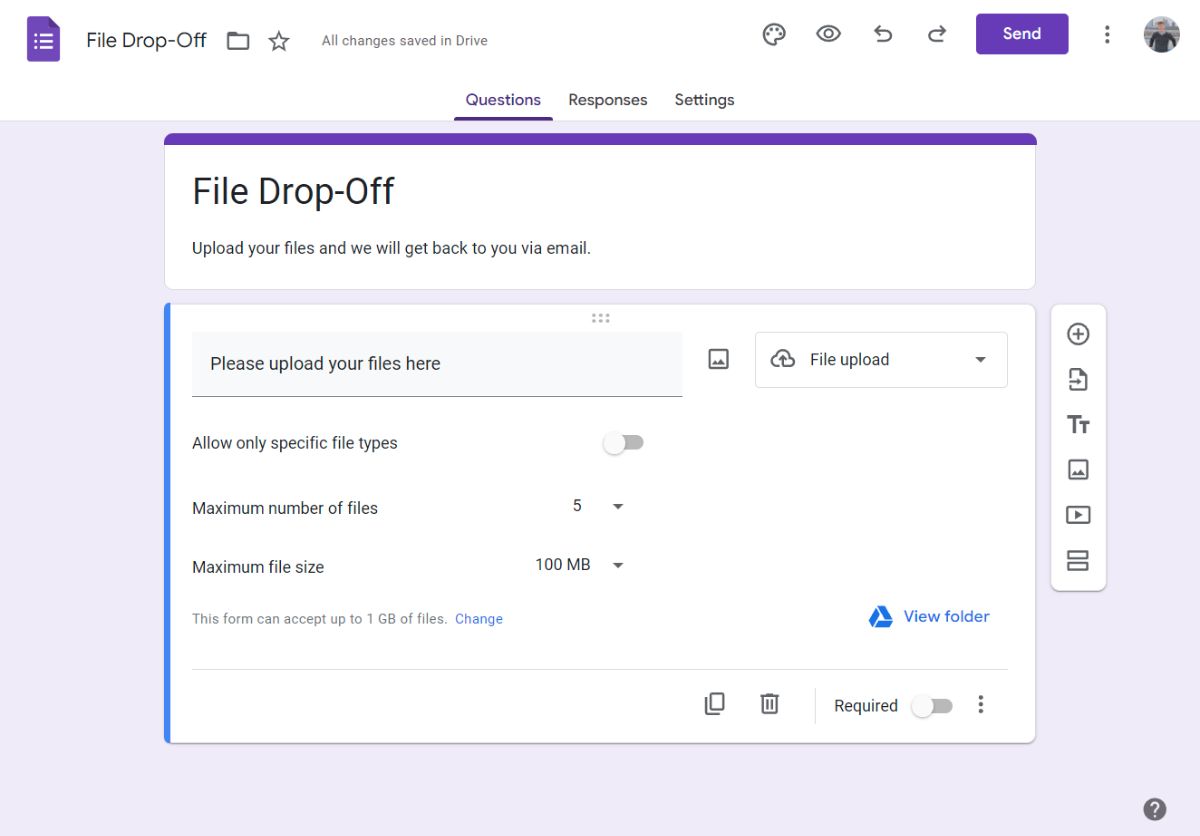
Now you'll have a file upload field on your form. There are a few options you can set. I suggest setting the name (so your clients know what to upload), the number of files (the default only allows for one!), and the maximum file size. Don't forget to set the file upload field to required!
I could only set the maximum file size to 10GB. If you need larger files from your clients, you'll be better off with another client portal option. But, most files are well under 10GB. To put that in perspective, 10GB could easily store 2,000 high quality photos.
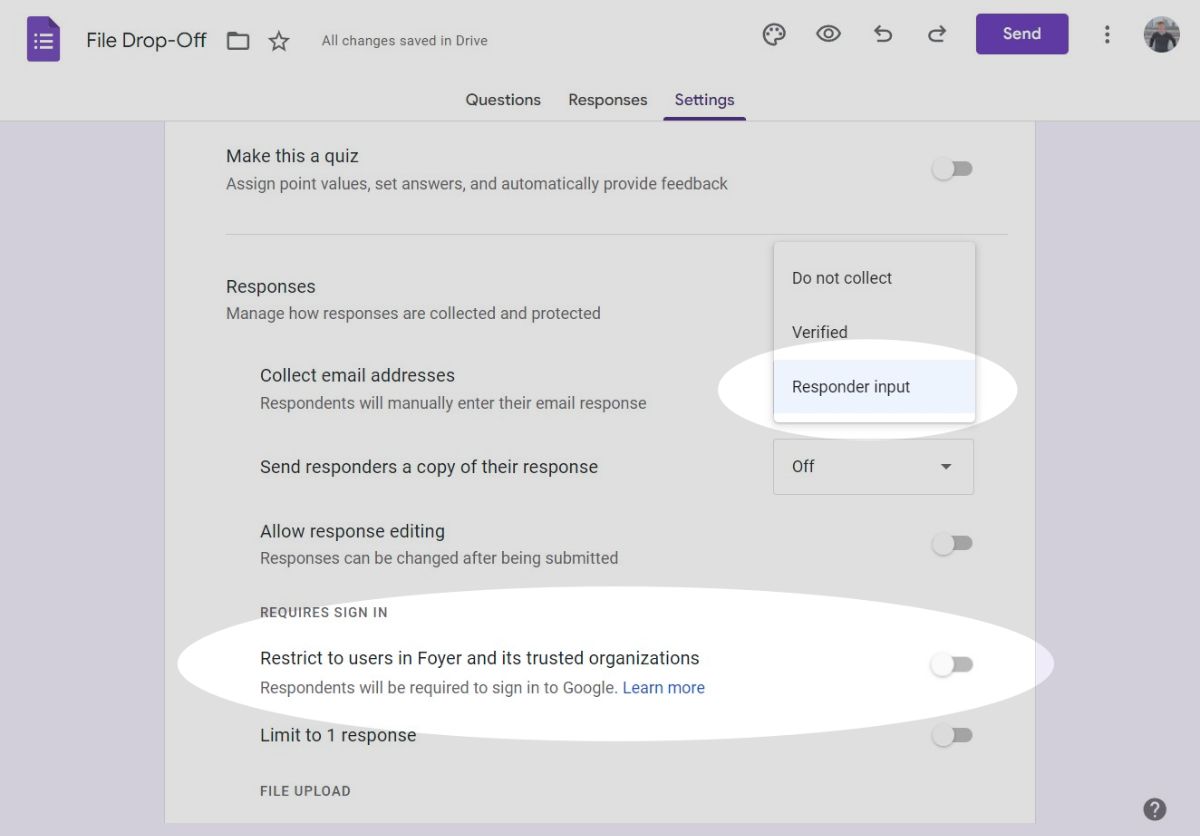
There are two options we have to change on the Settings page to allow for clients to submit the form without being in your Google Workspace organization. First, set "Collect email addresses" to "Responder Input". This will add a field to the form that will prompt for the client's email address. Clients will still need a Google account to submit files, but it does not have to be part of your organization. Setting "Responder Input" lets your clients share their non-Google email with you (it will be visible when viewing form responses).
To open up the form to people outside of your Google organization, you'll need to turn off "Restrict to users in _____ and its trusted organizations" to off.
Step 2: Test Your Google Form
Your form is all ready for clients to securely upload their files to you. It's always a good idea to test out the experience before adding to your Google Site, so let's try it out ourselves.
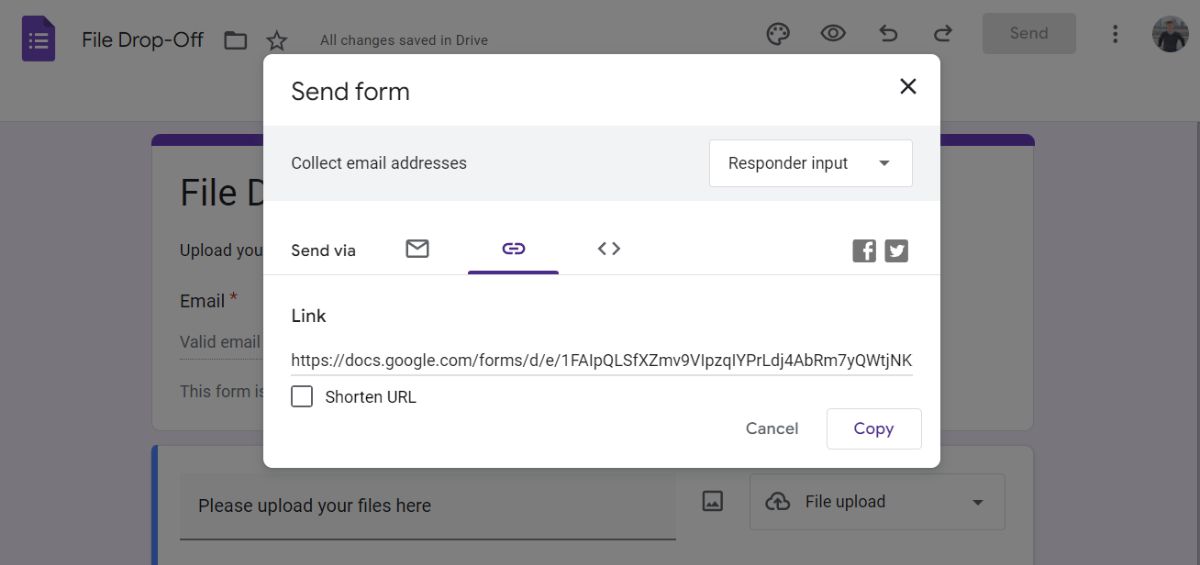 To access your Google Form, click the "Send" button on the top of the page. A dialog will show, and by default, you'll be on the email tab. Click on the link icon, and you'll have access to a sharable link.
Copy that link, and in a new tab, navigate to it in your browser. If possible, you should test the link using your browser's "Incognito Mode", this is a more authentic test because otherwise Google will automatically log you in.
It is important that your clients can access the form without being in your Google Workspace organization. So if you have a personal Google account, you should test with that.
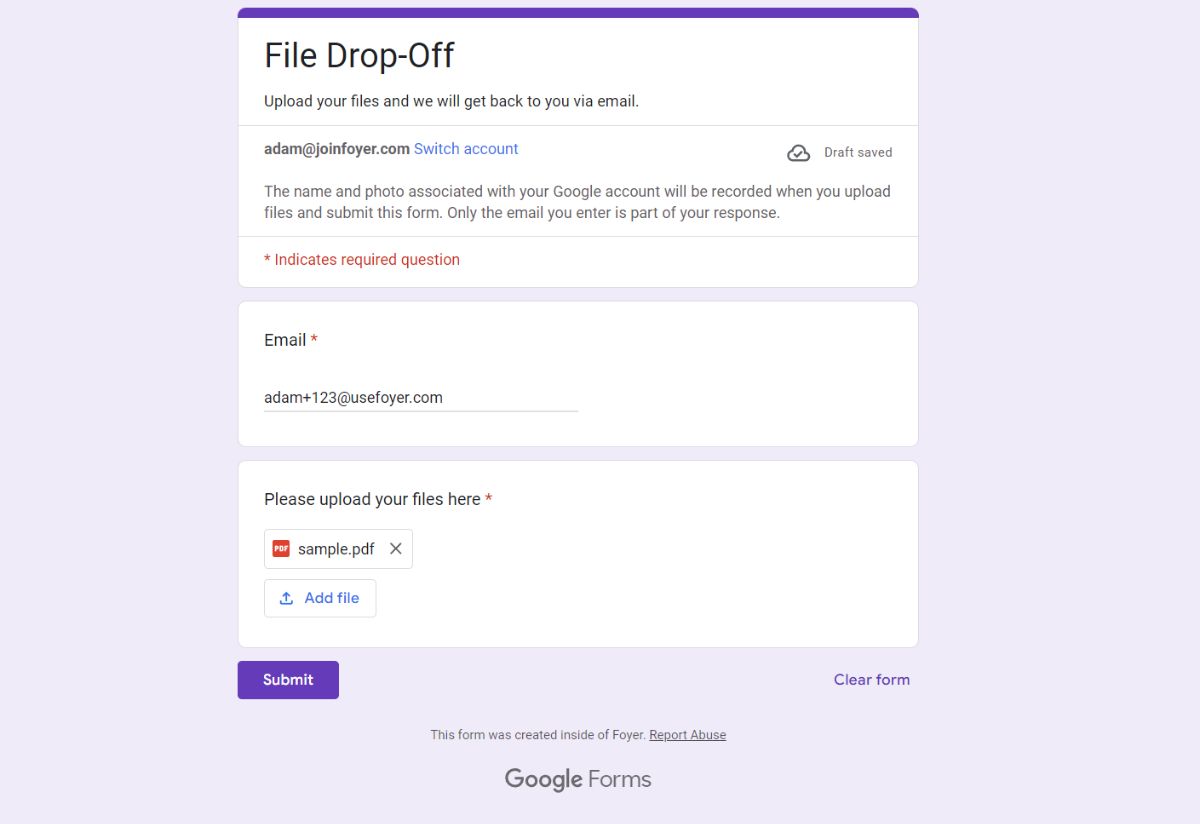
After visiting the link you may be asked to login (remember to login with a personal Google account). After logging in, you'll be able to fill out the form's fields and submit it. Notice how Google Forms automatically added that email field for us.
Step 3: Viewing Form Responses
Whenever a client submits a form, you'll get a notification in Google Forms. You'll be able to see it on the "Responses" tab. The screenshot below shows what viewing a form response looks like.
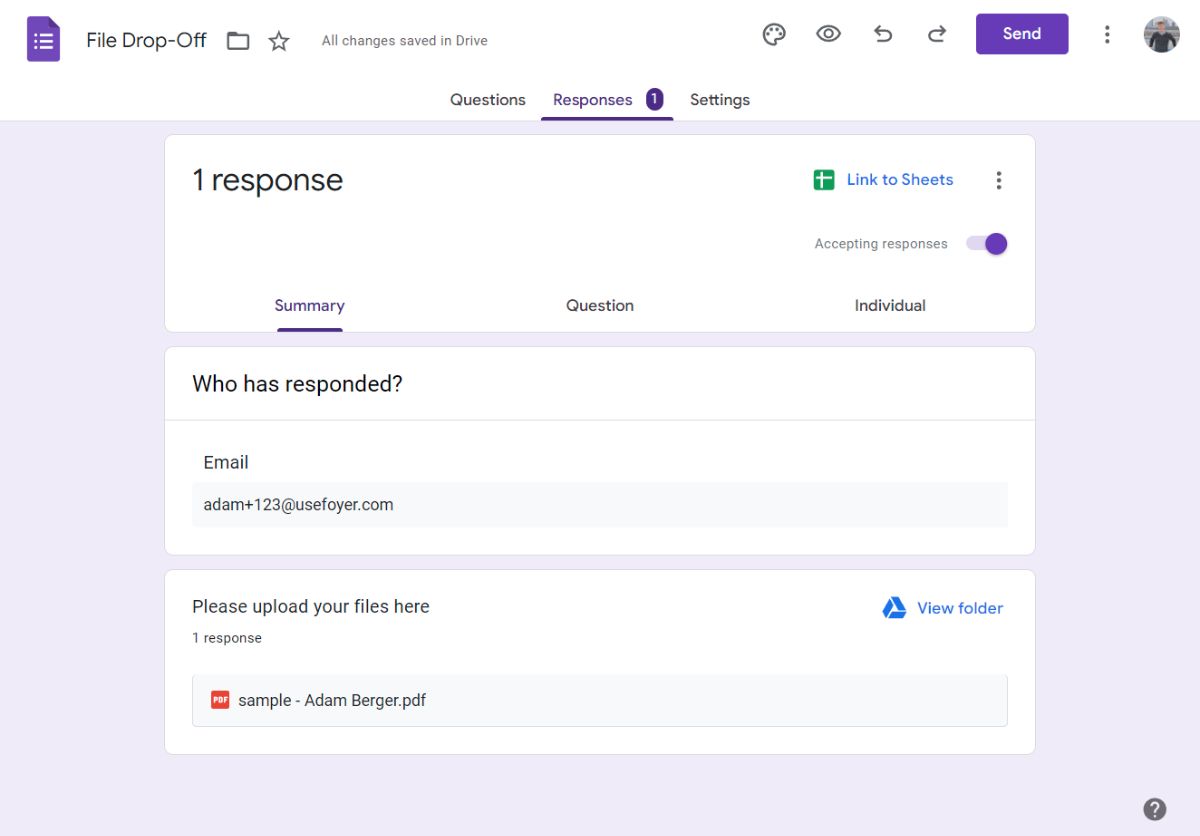
Notice how you have access to the client's email (which is different than their Google account email), and all of the submitted files.
If you just needed a client portal to securely receive files from clients, then this Google Forms File Drop-Off portal is all you need.
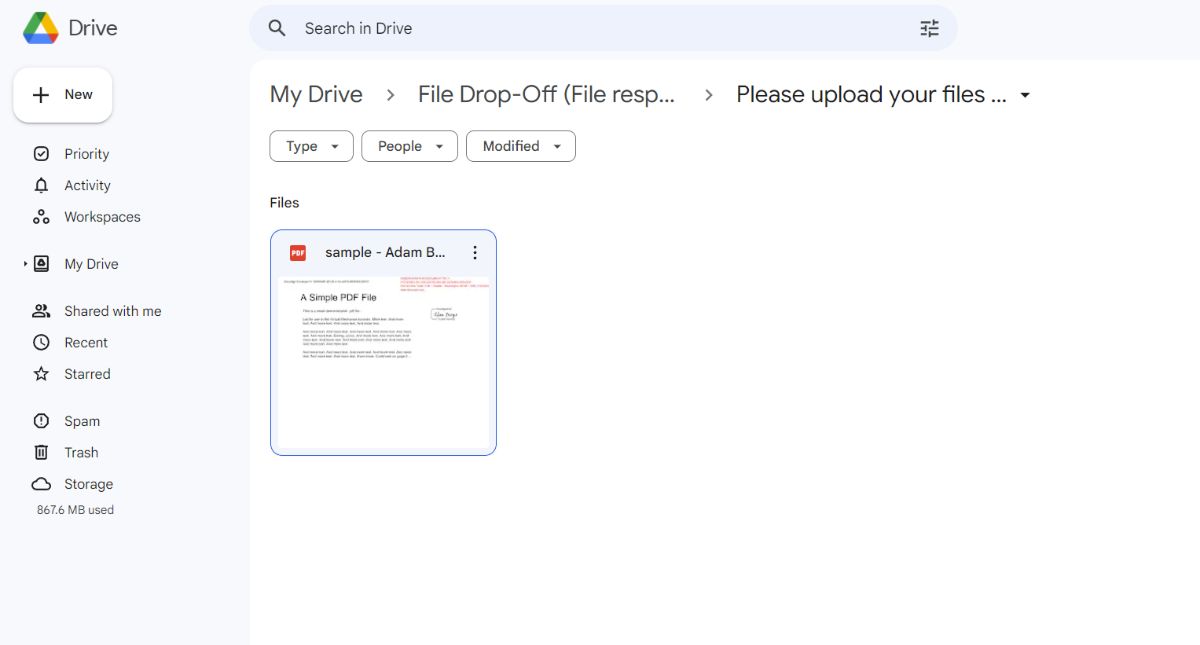
Files uploaded via Google Forms are also available in your Google Drive. Google Forms automatically creates a new folder with the same name as the form (in this case, "File Drop-Off"). Check out the screenshot below, the file and folder structure was automatically added when I submitted a test form.
Allow Clients to Upload Files to Your Website with a Client Portal

If you need more than just file uploads, then using a client portal like Foyer is your best bet.
With Foyer, you can spend just $10 per month and you can allow clients to upload files to any website, and you also get:
- Secure file sharing with clients
- A secure messenger to send clients encrypted messages
- Email and desktop notifications for all portal activity
- Audit trails for every action (login, file download, file upload, etc...)
- Client multi-factor authentication (MFA/2FA) support
- Requesting e-signatures from clients
- Custom forms to collect specific client information
- Secure email via Microsoft Outlook
- An internal knowledge base builder to share internal business documents and trainings
- Desktop and mobile support
You can integrate Foyer into your website to have a fully featured client portal while keeping your monthly costs low.
Let's get right into how you can use Foyer to allow clients to upload you files.
Step 1: Create a Client Portal With Foyer
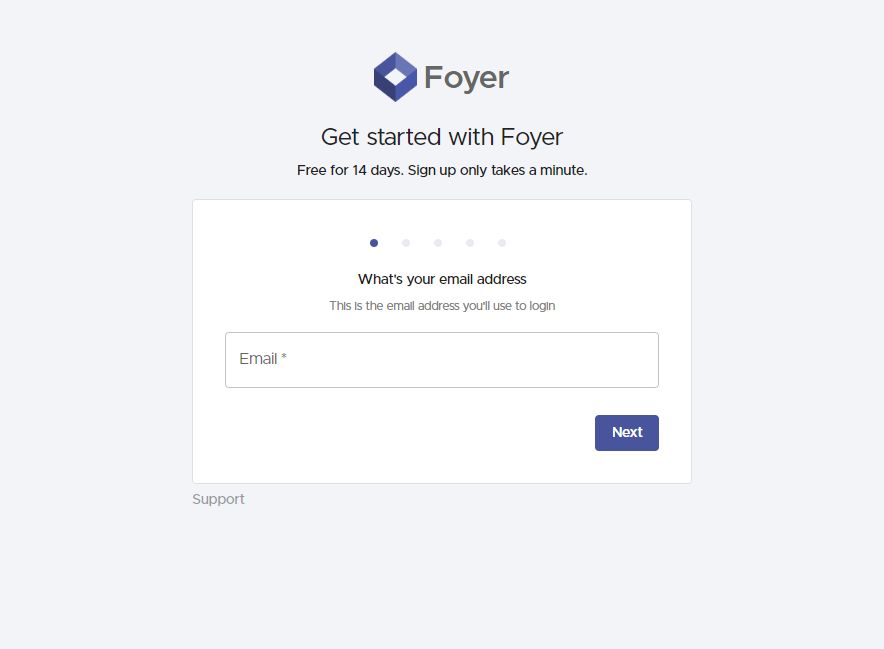
First, head to the onboarding wizard and enter your name, email, and business name. Your client portal will automatically be created, it takes around 1 minute.
Your portal will be accessible as a "subdomain" of Foyer, like this: example.usefoyer.com. You can choose which "subdomain" you want in the onboarding wizard.
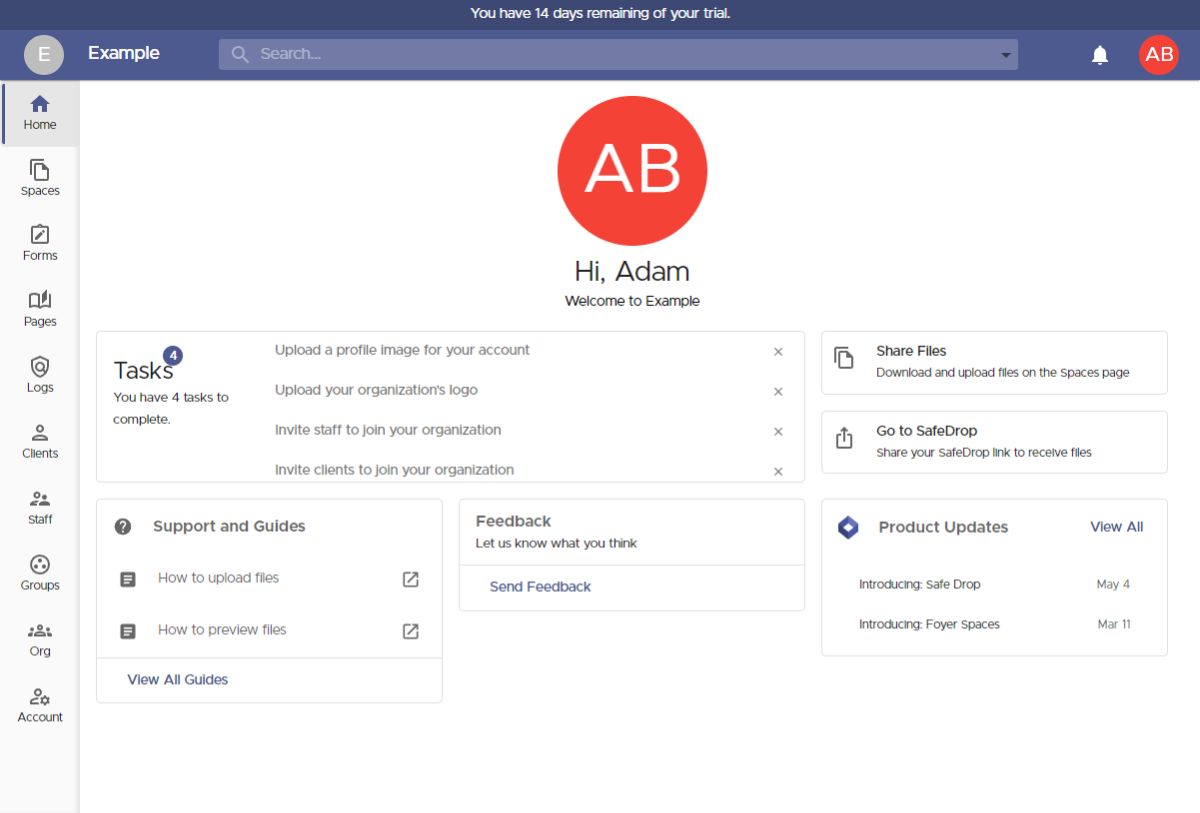
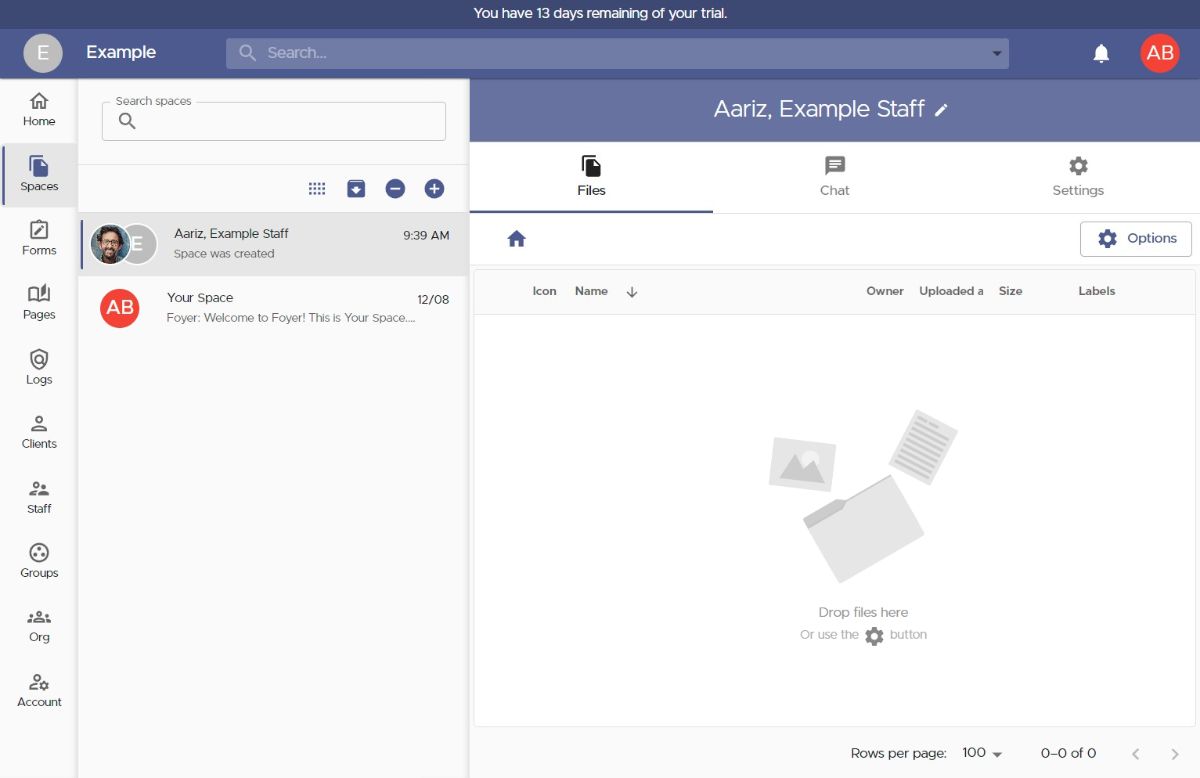
After making your client portal, you'll be automatically logged in. There's a lot of features to take in, but here's a quick breakdown of all the pages on the left drawer:
- Spaces: secure file sharing and messaging for clients or staff
- Forms: Custom forms (similar to Google Forms) for collecting specific data from clients
- Pages: A knowledge base builder for you to create and share internal documents and trainings
- Logs: A full audit trail of all activity within Foyer
- Clients: This is where you can view, and invite new clients to your client portal.
- Staff: This is where you can view, and invite employees or staff to your client portal.
- Groups: For creating groups of clients and staff that you can use throughout Foyer.
- Org: This is where you can white-label your client portal (change color, business name, customize emails)
- Account: Where you can set your notification preferences, and configure multi-factor authentication
Step 2: Invite a Client
To invite a client to your client portal, click on the "Clients" page on the left drawer. Then click on the "Invite Client" button on the top of the page. Using the "Add Client" drawer on the right, you can enter the email of the client you'd like to invite.
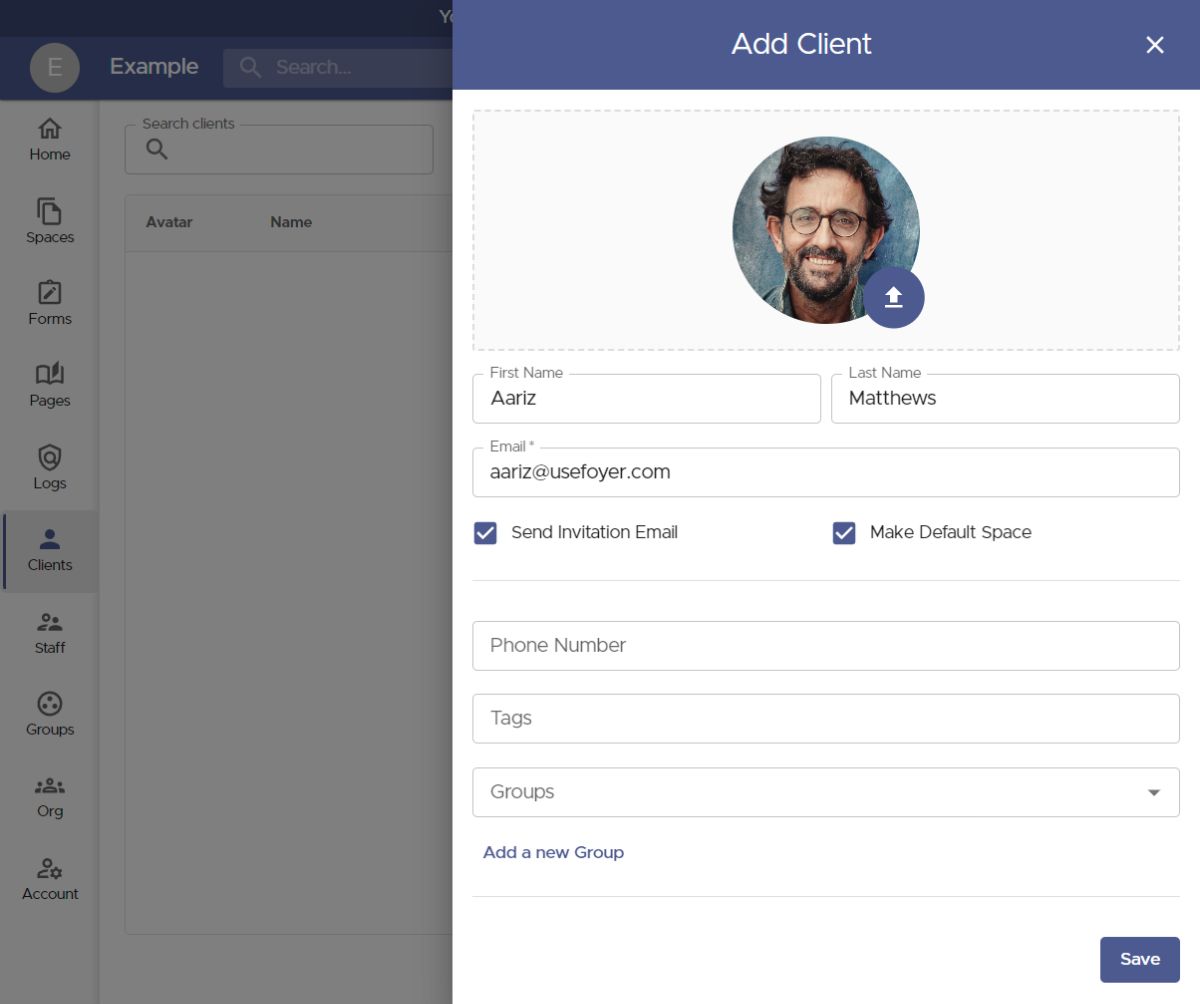
The client's email is the only required field. If you'd like you could also add a first name, last name, or profile picture. If you have several clients belonging to the same business, you could click "Add a new Group" to add them all to a group. This will make sharing files with the whole business easier.
When inviting a client you have two options:
- If "Send Invitation Email" is checked: the client will be sent an email where they can set a password for their account.
- If "Send Invitation Email" is unchecked: the client will not be notified that they were added, but they can still login without a password (using email verification).
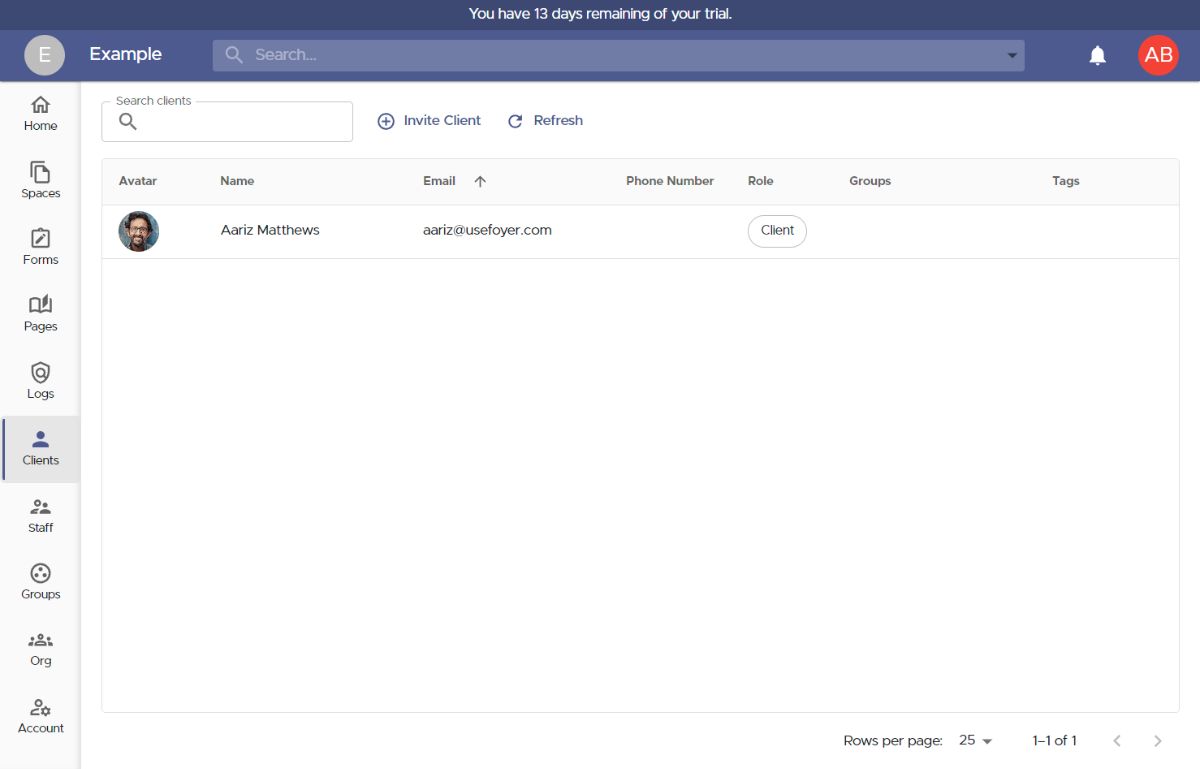
All clients that are invited, and registered will show up in the clients table. Because we left "Make Default Space" enabled when inviting our first client, there will be a new space created in the "Spaces" tab. Let's head over there to see how we can share files.
Step 3: Sharing Files with Clients
On the "Spaces" page, you'll find all the conversations you're a part of. This includes both files shared with your clients and secure messages.
In the screenshot above, you can see that the client we invited has a default space. To share files with that client, all you do is click on their space, then drag-and-drop files into the "Files" page. You can even upload entire folders.
You and your clients will be notified via email whenever there is a new file upload or unread message.
The Files page is also where you can request e-signatures from clients. If you need to collect file signatures from clients, check out this guide on how to send file signature requests.
Step 4: Use Foyer's SafeDrop to Receive Files Without Client Login
For some workflows, it is easier to skip the process of inviting clients, and just allow them to upload files without an account. Foyer has a solution to this called Foyer SafeDrop.
Every Foyer organization has a SafeDrop portal included. You can find you link on the "Home" tab, or by visiting "example.usefoyer.com/upload" (replacing "example" with your org's subdomain name).
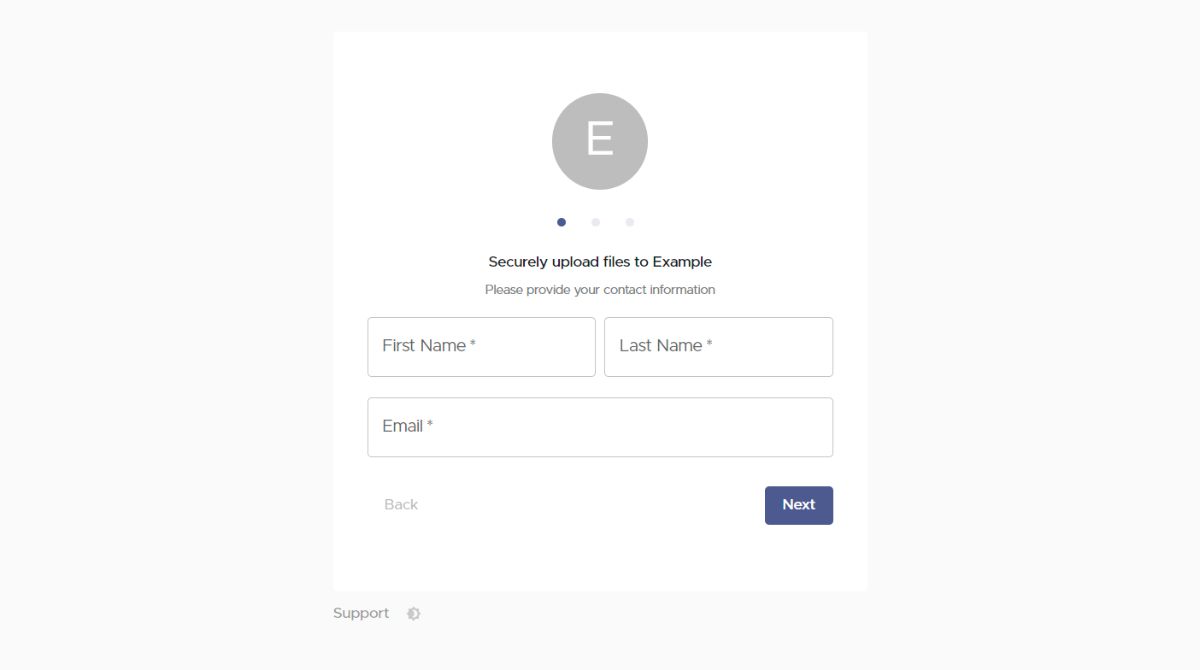
The experience here is similar to what we showed earlier with Google Forms. But, the benefit to using Foyer SafeDrop over Google Forms, is that SafeDrop allows for:
- Automatic creation of an account (so users can access the files they uploaded -- and even receive files)
- They will need to login with email verification (passwordless)
- There's no limit to the file size you can upload (Google Forms was limited to 10GB)
- You don't need an account to upload files (Google Forms required a Google account)
All files uploaded with Foyer SafeDrop will be added to a new Space, and the name will start with "SafeDrop from ...". Just like normal Spaces, you and the client will receive a notification for any files that are uploaded.
How to Integrate Your File Upload Portal into Your Website
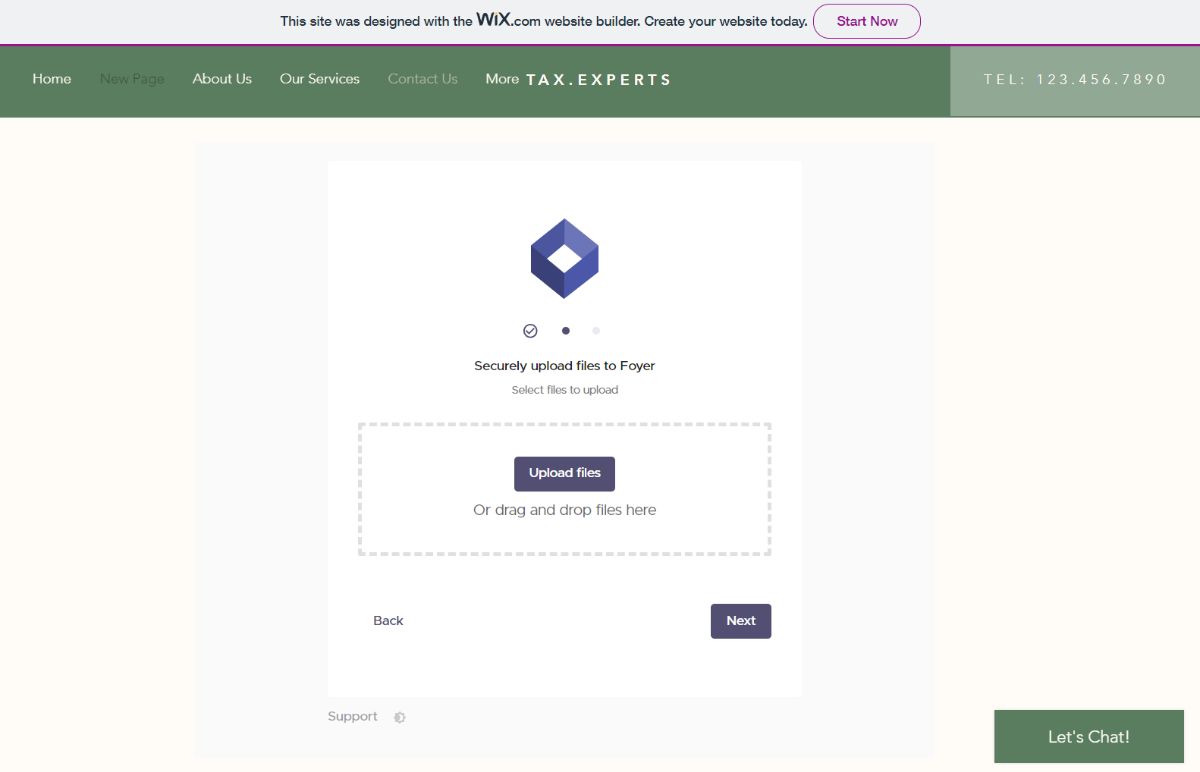
Now that you chose a service to allow customers to upload files to you (either Google Forms or Foyer), it's time to link or embed your new file upload portal to your website.
The instructions for linking your file upload portal to your website will vary depending on how your website was set up.
If you use Wix, check out our guide on how to link and embed a client portal to any Wix website.
If you use Google Sites, check out our guide on how to embed a client portal into any Google Site.
If you use SquareSpace, WordPress, WebFlow, Weebly or GoDaddy, I recommend you check out our Wix guide, as the process will be very similar.
If you use an agency or contractor to setup your website, all you need to do is send them the link to your Google Form or your Foyer organization, and they can just add a link to your menu bar. Typically, firms and agencies just add a link and name it "Send a File". To make it as easy as possible for your clients to find the link, I recommend putting it both in your navigation menu, and your site's footer.
How to Allow Clients to Upload Files Without a Website
If you don't have a website, that's no problem! Both Google Forms and Foyer can be used without a website.
For Google Forms, you just have to visit your Form, and click the "Send" button on the top of the page. From there you can select the "Email" option for a link to be sent via email to a client, or you can copy the form link, and send the link to your clients however you'd like.
With Foyer, there's a bunch of ways you can share files without using a website. Whenever you invite a client, it will send them an email with all the instructions they need to upload files. You'll even get email notifications when you receive new files from clients.
You can also use Foyer SafeDrop to easily accept files without a website. Just send your clients your Foyer SafeDrop link from your home page. It'll look like this: "example.usefoyer.com/upload" just replace "example" with your organization's subdomain name.
I've seen a lot of firms and agencies put a link to their client portal right in their email signature, and that works great. Just add a line that says "Send me a file" that links to either Google Forms or your Foyer organization.
What's the Best Way To Allow Customers to Upload Files?
There's no doubt that using Foyer to create a client portal is a more flexible option than Google Forms. But if you're on a budget, and you just need to collect documents from clients, the free Google Forms option could work great.
Which method did you use to allow clients to upload files to any website? Let us know by sending a comment below!